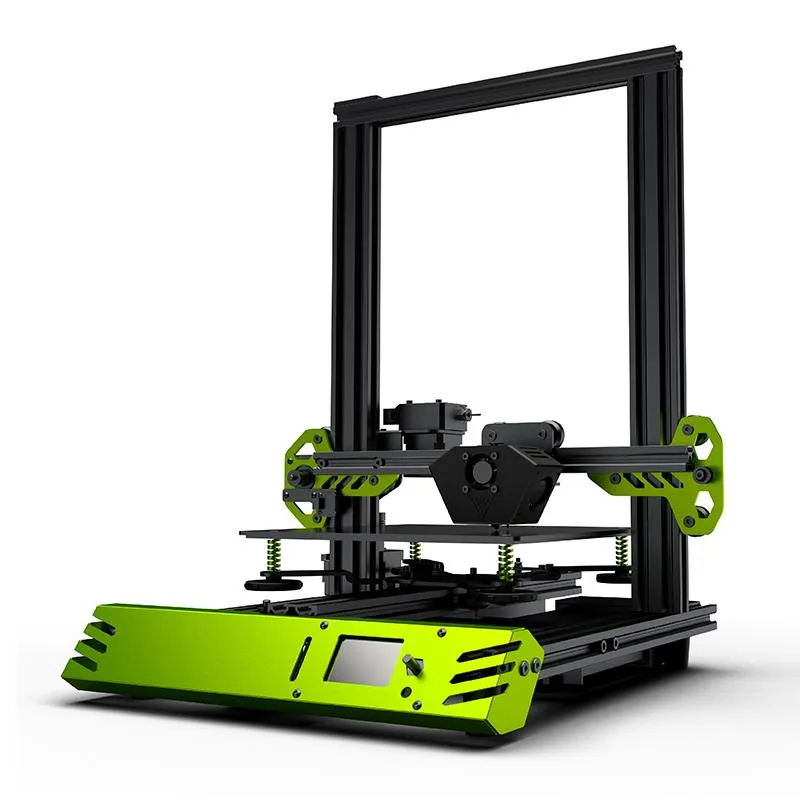
Unboxing Your Tarantula i3 Printer
Congratulations on your new Tarantula i3 printer! This guide will walk you through the setup process, ensuring you get your 3D printer up and running smoothly. Before you begin, find a clean, well-lit workspace. Carefully unpack all the components, comparing them to the parts list in your user manual. Make sure everything is present and undamaged. Take your time and familiarize yourself with the various parts. This initial step is crucial for a successful setup and to avoid potential issues later. Lay out all the parts and components to make sure you have a clear understanding of what needs to be assembled.
Components and Tools You’ll Need
Before assembly, gather all the necessary tools. Your Tarantula i3 typically comes with some of these, but you may need additional ones. Essential items include a set of Allen wrenches (hex keys) of various sizes, a Phillips head screwdriver, wire cutters or a flush cutter, and a multimeter (for checking electrical connections). Other helpful tools are a small level, a ruler or measuring tape, and perhaps a pair of tweezers. Having these tools readily available will significantly streamline the assembly process. Keep the user manual handy to check which specific tools are provided and what else you might need.
Assembling the Tarantula i3 Frame

The frame forms the backbone of your 3D printer. Start by connecting the frame components according to the instructions in the manual. This usually involves attaching the vertical supports to the base using screws and brackets. Ensure the frame is square and stable before proceeding. Tighten the screws securely, but avoid over-tightening, which could damage the frame. Double-check all connections to guarantee the frame is rigid and aligned. Proper frame assembly is critical for the printer’s stability and print quality, so take your time and make sure everything is aligned properly.
Attaching the X and Y Axis Motors
The X and Y axis motors control the movement of the print head across the print bed. Attach these motors to the appropriate brackets on the frame, following the diagrams in your manual. Make sure the belts are properly aligned and tensioned to prevent any slippage during printing. Check that the motor pulleys are securely fastened to the motor shafts. Once the motors are in place, make sure that the axes move freely without any binding. This ensures that the print head can move smoothly and accurately, which is crucial for achieving high-quality prints. Ensure that the belts are not too loose or too tight, as this can affect print quality.
Mounting the Heated Bed and Power Supply
The heated bed is where your prints will adhere. Mount the heated bed to the appropriate supports, ensuring it’s level. The power supply provides the electricity for the printer; mount it securely to the frame, preferably in a location with good ventilation. Connect the power supply to the heated bed and the control board, following the wiring diagrams provided. Double-check all connections to prevent short circuits. Be cautious when working with electrical components, ensuring proper connections to prevent electrical hazards. Make sure all wires are properly insulated and secured to prevent any accidental disconnections or short circuits.
Connecting the Electronics

This step involves connecting the various electronic components to the control board. This includes the stepper motors, the endstops, the thermistors (for temperature sensing), and the heated bed. Refer to your manual for the correct placement of each wire, and be extremely careful with the connections. Misconnecting wires can damage your printer. Make sure all wires are securely plugged in, and that they are not loose. Use cable ties or wire management to keep the wires tidy and prevent them from getting caught in moving parts. Pay close attention to the polarity of the connections, especially with the heated bed and power supply.
Wiring the Control Board
The control board is the brain of your 3D printer. Carefully connect the stepper motor drivers, endstop switches, thermistors, and heated bed wires to the control board. Ensure all connectors are firmly seated and that the wires are routed safely to prevent interference with moving parts. Use the correct connectors and check your manual for any specific requirements related to the board you have. Incorrect wiring can easily damage your printer, so double-check every connection before applying power. Organize the wiring to avoid tangling and ensure it does not obstruct the printer’s movements.
Connecting the LCD Screen and SD Card Reader
The LCD screen and SD card reader allow you to control the printer and load print files. Connect the LCD screen and SD card reader to the control board, following the diagrams in your manual. Secure all connections, and make sure the LCD screen is mounted properly. The SD card reader is crucial for loading your 3D models. Make sure the connection is secure so that you can start printing as soon as possible.
Firmware and Software Installation

Before you can start printing, you’ll need to install the firmware and the necessary software on your computer. This involves downloading the software from the manufacturer’s website. This software will allow you to prepare your 3D models, slice them into layers, and send the instructions to your printer. Additionally, you need to flash the firmware to the control board, which will tell the printer how to operate. Make sure you download the correct software for your printer model.
Downloading and Installing Necessary Software
Visit the manufacturer’s website or the software’s official download page to get the necessary software, such as a slicer program (Cura, Simplify3D, etc.). Download the version compatible with your operating system. Once the download is complete, run the installer and follow the on-screen instructions. You might also need to install drivers for your printer to be recognized by your computer. Make sure you have the latest version of the software.
Flashing the Firmware
Flashing the firmware involves uploading the operating instructions to your printer’s control board. You will need to download the firmware from the manufacturer. Connect your printer to your computer via USB, and use a software like Arduino IDE to upload the firmware. Select the appropriate board and COM port in the software settings. Choose the correct firmware file, and click upload. This process may take several minutes. Do not disconnect your printer during flashing. Once the upload is complete, the printer is ready to use.
Initial Calibration and Testing

Calibration and testing are critical steps for ensuring accurate prints. Start by leveling the print bed and setting the Z-offset. This ensures that the nozzle is the correct distance from the bed during printing. Conduct some test prints to check the settings and make adjustments as needed. Take your time to ensure that every setting is correct before attempting complex prints. Careful calibration will save you time and material, and contribute to better print quality. Remember to consult your manual for any specific calibration instructions.
Leveling the Print Bed
Leveling the print bed ensures that the first layer of your print adheres properly. Most Tarantula i3 printers have manual bed leveling using screws at each corner of the bed. Place a piece of paper or a leveling card between the nozzle and the bed. Adjust the bed leveling screws until the nozzle just touches the paper as you move the print head across the bed. Repeat this for each corner until the paper can be moved with a slight resistance across the print bed. Repeat this process until you achieve the correct height across the bed. This ensures a smooth, even first layer and avoids warping.
Setting the Z-Offset
The Z-offset determines the distance between the nozzle and the print bed. A correct Z-offset is essential for proper first-layer adhesion. Use the printer’s control panel or software to set the Z-offset. The ideal distance depends on the filament and bed surface used. During the first print, observe the first layer and adjust the Z-offset as needed, so the filament is slightly flattened against the bed. Adjust the Z-offset in small increments until you get the perfect adhesion. This is a crucial step to ensure the successful printing.
First Print and Troubleshooting

After setting up your printer, it’s time for your first print! Load your chosen filament, and select a test model from the SD card. Observe the printing process and be ready to troubleshoot any issues that might arise. Troubleshooting is a normal part of the 3D printing experience. Start with simple models before moving on to more complex designs. Be patient, and refer to troubleshooting guides or online resources if needed. Enjoy your first print!
Loading Filament
Loading filament correctly is essential for a successful print. Heat the nozzle to the recommended temperature for the filament type. Insert the filament into the extruder and push it through until it comes out of the nozzle. Watch the filament flow smoothly and without any interruptions. Ensure the filament is feeding correctly, and there are no obstructions. If you encounter any problems, consult your manual for instructions on clearing the extruder.
Starting Your First Print
Select a pre-sliced model from the SD card or your computer. Heat the bed and nozzle to the recommended temperatures. Start the print and watch the first layer. Make sure the filament adheres properly to the bed. If necessary, adjust the bed leveling or Z-offset. Monitor the print throughout its process and be ready to stop the print if any problems arise. Congratulations on your first print! Be patient as it’s a learning process.
Troubleshooting Common Printing Issues

You might encounter some common printing issues, such as poor bed adhesion, warping, or stringing. Poor bed adhesion can be caused by an unlevel bed or incorrect Z-offset. Warping can result from temperature issues or drafts. Stringing occurs when the filament oozes during travel moves. Refer to online forums and troubleshooting guides to solve any such issues. Always consult the user manual and online resources for solutions to different problems.